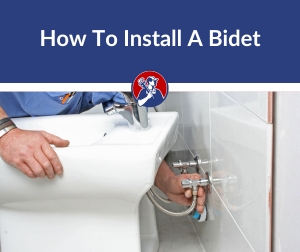
This guide will help you answer the question, “how to install a bidet?”
The focus will be on a “traditional bidet” install. The traditional standalone bidet is a separate bathroom fixture that is similar to a toilet or sink install, and requires a fair amount of plumbing experience.
And we will briefly cover the different types of DIY bidets currently available, from a simple bidet attachment to a modern electronic bidet toilet seat. Those bidet types are much easier to install. There’s a lot to get to, so “pitter-patter, let’s get atter!”
| What's In This Guide? | |
|---|---|
|
|
|
DIY Installation of Bidet Toilet Seat Attachments
Toilet seat bidets, also called bidet attachments, are designed to replace your existing toilet seat. These connect directly to your current water supply line without requiring any major modifications.
These units often come with detailed instructions that make installation relatively straight forward as you use your existing toilet bowl. People like these converter kits, as they are a very affordable way to test out this new way of life.
They are pretty easy!
As long as you carefully follow the manufacturer’s guidelines, there should be no need for professional assistance when installing these devices.
To demonstrate how to install a bidet attachment, here is a video from one leading manufacturer demonstrating how easy it is.
How to install a Bidet Toilet Seat Attachment:
This one is super affordable with great reviews. Here is the specific product she is using in this video, on Amazon.
Whether or not you need to hire a plumber largely depends on which type of bidet you choose to install. Most people are comfortable installing a bidet attachment on their own.
Let’s take a look at what those plumbing requirements are for installing a traditional bidet. These are a bit more involved!
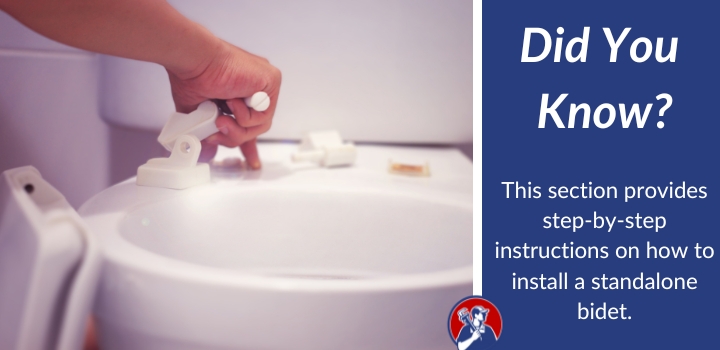
How to Install a Standalone Bidet
Here is a time lapse of a traditional bidet installation to see what you’re getting into.
1. Choose the Right Location
Selecting an appropriate location for your standalone bidet is crucial for proper installation and functionality. Ensure there is enough space for comfortable use, access to existing plumbing connections, and proximity to a GFCI outlet if required by your specific model.
Installing a standalone bidet requires what’s known as the plumbing “rough-in” to be done prior to the bidet installation.
2. Prepare Plumbing Connections
a. Determine Water Supply: Identify whether you need hot and cold water supplies or just cold water supply based on your chosen bidet model.
b. Shut Off Valves: Install shut-off valves at both hot and cold-water connections (if applicable).
c. Tee Fittings: Connect tee fittings between shut-off valves and existing pipes as needed according to manufacturer guidelines provided in their manual.
Again, we recommend you contact a licensed plumber to do the rough-in work. That is not typically DIY plumbing material.
When that’s done, you are ready for the bidet installation. Follow these step-by-step instructions which include connecting the water supply lines and mounting the bidet to the wall or floor.
3. Mounting Your Standalone Bidet
a. Floor-Mounted Installation: If installing a floor-mounted bidet, follow the manufacturer’s instructions to secure it with mounting brackets or bolts. Ensure that it is level and stable before proceeding.
b. Wall-Mounted Installation: If installing a wall-mounted bidet, use the appropriate mounting bracket for your wall type (e.g., drywall or tile) and ensure they are properly secured with mounting bolts. Check that the bidet is level and securely attached to the wall.
4. Connect Water Supply Lines
a. Flexible Hoses: Attach the flexible water supply hose(s) from shut-off valves to corresponding inlets on your standalone bidet using plumber’s tape on threads for a watertight seal.
b. Tighten Connections: Use wrenches to tighten connections between hoses and both shut-off valves as well as inlets on your bidet until snug – but not overtight – this can cause damage or leaks over time if too tight.
This section provides step-by-step instructions on how to install a standalone bidet, including selecting an appropriate location, and the plumbing rough-in that needs to be done.
5. Test the Bidet Install for Leaks
After successfully installing your bidet, you need to test for any potential leaks to ensure a safe and efficient system. This guide will take you through the steps of verifying for any leaks and offer helpful advice on how to rectify them if needed.
Turn On Water Supply
To begin testing, turn the water supply back on by opening the main shutoff valve or toilet shutoff valve that was closed during installation. Slowly open the valve while keeping an eye on all connections in case of sudden water leakage.
Check Connections
Inspect each connection point between your bidet and plumbing system carefully as you gradually increase water pressure by opening the valves further:
- The T-adapter connecting your existing toilet fill valve and bidet hose;
- The connection between the bidet hose and inlet port on your standalone or seat-mounted unit;
- If applicable, check where warm water supply lines connect with a mixing valve or temperature control device.
Tip: You can run your finger around the fitting/connector to help detect for slight leaks.
If there are no signs of leakage at these points when operating under normal pressure levels, you’re all set.
Fixing Potential Leaks on Your Bidet Install
In case you do find any leaks during this inspection process, don’t worry. Most issues can be resolved using simple troubleshooting techniques:
- Tighten loose connections: Use an adjustable wrench to gently tighten any fittings showing signs of leaking until they’re secure but not too tight. Make slight adjustments until the leak stops so you don’t over tighten, which could damage the connectors;
- Apply plumber’s tape: If tightening doesn’t resolve minor seepage around threaded connections, try wrapping a few layers of plumber’s tape or plumbers putty around the threads before reassembling;
- Replace damaged parts: If you notice any visible damage to components such as cracked hoses or gaskets, replace them with new ones to ensure proper sealing.
Now that you’ve got the leaks taken care of, your bidet installation is complete.
Key Takeaway:
After installing a bidet, it’s important to test for leaks. To do this, turn on the water supply and check all connections carefully.
Bidet Installation Cost
When considering the addition of a bidet to your bathroom, one of the first questions that probably comes to mind is how much will it cost?
The bidet installation price can vary greatly depending on several factors, including the type of bidet you choose (some, like the electric bidet toilet seat, come with a heated seat, bio bidet features, and water heater), and whether or not you decide to hire a professional plumber for assistance.
The cost can range from $100 for a simple non-electric bidet seat that attaches to your toilet, to over $1,000 for a professionally installed stand-alone bidet.
Of course a DIY project will save you some money. Let’s look at the different styles of bidets.
Type of Bidet Determines Installation Cost
The type of bidet plays a significant role in determining its installation cost. There are various types available on the market:
- Standalone bidet
- Bidet toilet seat
- Handheld bidet (bidet sprayer)
- Electronic bidets with advanced features such as warm water, heated seats, and air-drying functions
Determining Costs: DIY vs Professional Installation
If you’re comfortable with basic plumbing tasks and have some experience under your belt, you could potentially save money by handling the installation yourself.
However, if this is outside your skillset or comfort zone, or if you’re dealing with a more complex bidet model, it’s best to hire a professional plumber for the job. While this will increase your overall costs, it ensures that the installation is done correctly and safely.
While hiring a plumber can be beneficial for complicated installations, there are many DIY projects that homeowners can do themselves with just basic tools and experience.
Key Takeaway:
The cost of installing a bidet varies depending on the type chosen and whether or not professional help is required. Standalone models require more extensive plumbing work, while handheld sprayers or electronic seats can be installed by homeowners.
Do You Need a Plumber to Install a Bidet?
The answer depends on the type of bidet you choose and your level of comfort with plumbing tasks. There are two main types of bidets: standalone (or floor-mounted) and bidet toilet seats.
Professional Installation of Standalone Bidets
A standalone bidet is separate from the toilet and requires its own water supply line, drain connection, and sometimes even additional support structures.
Installing this type of bidet typically involves more complex plumbing work than attaching a simple seat attachment or sprayer.
If you’re not experienced with plumbing projects or don’t feel confident tackling this task yourself, hiring a professional plumber would be advisable for this option.
Plumbing Requirements for a Bidet
This section will discuss the standalone bidet requirements and existing toilet plumbing requirements.
Standalone Bidet Requirements
A traditional bidet is a standalone fixture that requires its own water supply and drain connections. To install this type of bidet, you’ll need:
- A cold-water supply line with a shut-off valve
- A hot-water supply line if your bidet has warm water features (optional)
- An appropriate waste pipe connection or floor flange for drainage
- Sufficient space in your bathroom to accommodate the size of the bidet
- Compliance with plumbing codes and standards in your area.
Now, let’s look at what materials are needed in order to complete this task.
Gather Necessary Materials
Before starting, gather all the materials and tools you will need:
- Adjustable wrench: This tool is crucial for tightening connections and securing nuts during the installation.
- Screwdriver: A screwdriver will be needed to secure mounting brackets or other hardware that may come with your bidet.
- Teflon tape (also known as plumber’s tape): Teflon tape helps create watertight seals on threaded pipe connections, preventing leaks.
- Bidet kit or components: Depending on the type of bidet you’ve chosen, make sure you have all parts included in your purchase or any additional components required for proper installation.
In addition to these basic tools and materials, it’s always helpful to have some extra towels, gloves, and a bucket
FYI: If this is your first time attempting a DIY plumbing project like this one, we recommend consulting a licensed professional plumber to do the installation for you.
Shut Off Water Supply
Before installing the bidet, you need to turn off the water supply to your toilet tank in order to prevent any potential leaks or flooding during the bidet installation.
Toilet Shut-Off Valve
In most cases, shutting off the water supply directly at the toilet is sufficient for installing a bidet. Locate the toilet shutoff valve, which can usually be found on the wall behind or beside your toilet, connected to its base by a flexible hose. Turn this valve clockwise until it stops moving; this indicates that it has been fully closed.
- Note: If you have difficulty turning either of these valves, use an adjustable wrench for extra leverage but avoid using excessive force as this may damage them.
- Safety Tip: After closing either of these valves, flush your toilet once more before proceeding with installation to ensure there’s no remaining pressure in the line.
Main Shut-Off Valve
If your toilet doesn’t have its own shut-off, you’ll need to locate the main shut-off valve. It’s usually near your water meter or in a utility room such as a basement or garage. The main shut-off valve typically resembles a wheel or lever and should be turned clockwise to close it.
Now that you’ve successfully cut off your bathroom’s water supply, proceed with gathering all the necessary materials and tools needed for installing your new bidet.
Caution: Backflow and Cross-Contamination
It is a good idea to have your work inspected by a licensed plumber, particularly with issues of cross-contamination. Backflow prevention refers to contaminated water flowing back into the drinking water supply. This is an important health safety issue.
Final Thoughts on Installing Your Bidet
Installing a freestanding bidet is a more complicated job that should probably be done by a professional plumber. But there are many options that can be an easy DIY.
Considering the environmental and financial benefits, installing a bidet product is an excellent way to improve your bathroom experience. Not only does it reduce toilet paper usage, but it also provides better hygiene and comfort.
FAQs in Relation to How to Install a Bidet
Can you add a bidet to a regular toilet?
Yes, you can add a bidet to your toilet. There are many DIY options that use your existing toilet.
Is installing a bidet easy?
A traditional or freestanding bidet is difficult to install. It usually requires a licensed plumber. But there are many options like toilet seat bidets and even a portable bidet that are easy to install.
Do you need a hot water line for a bidet?
You will need access to a hot water supply for a mechanical bidet that offers a variety of temperatures. You can tap into an existing one, or have a new line installed near the bidet.
Meet Your Plumbing Navigator

About Plumbing Navigator
We’re passionate about all things plumbing, and love sharing tips, “how-to”, and reviewing the latest products to help make your project a success!
Learn More Plumbing Tips
Want to tackle more plumbing projects? Check out these helpful guides!