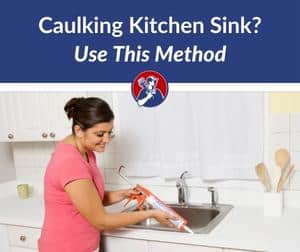
Do you have a leak developing at your kitchen sink faucet? You may be able to resolve the issue by caulking your kitchen sink to create a perfect seal. However, you won’t resolve the issue if you don’t do the job properly.
We can give you the information you need to recaulk your kitchen sink correctly.
In this PlumbingNav guide, we cover:
What you need to know about recaulking a kitchen sink
Supplies you’ll need to recaulk a kitchen sink
How to recaulk a kitchen sink
What's In This Guide?
What You Need To Know About Recaulking A Kitchen Sink
Caulk is a sealant used to seal gaps ¼” wide or smaller on stationary objects to prevent leaks and water damage.
Caulk is made from a number of different materials, including:
Silicone
Polyurethane
Water-based
Rubber
Latex
Oil-based
For plumbing purposes, you will most likely use silicone caulk or latex-based caulk. However, the caulk you use will depend on the material of the counter.
Caulk should be applied to both an undermount sink and overmount sink. However, undermount sinks in particular require adequate caulking. If your sink is slightly loose, consider tightening the sink clips before you begin.
You will need to apply new caulk to your sink every 3 – 5 years as part of your long-term plumbing maintenance.
Keep in mind that you will need to let the caulk dry for at least 24 hours after you apply it, so you will need to plan accordingly.
Kitchen Sink Leaks
10% of homes have leaks that waste 90 gallons of water or more a day. A leaky faucet can result in 3,000 gallons of water wasted in a single year.
The best kitchen sink faucets have leak protection and a WaterSense label, meaning that the faucet adheres to modern efficiency standards that reduce water waste.
Supplies You’ll Need To Recaulk A Kitchen Sink
Every DIY plumber needs the right tools for the job.
Caulking Gun
A caulk gun holds the caulk tube and gives you support to ensure that you complete the job properly. You can find a caulking gun at Home Depot or any other hardware store.
Putty Knife
A putty knife is a small, dull knife with a wide, flat blade designed to help with putty and other sealants, such as caulk.
Painters Tape
Painters tape is a blue tape with a mild adhesive made to help establish clean, even lines when painting or applying caulk.
How To Recaulk A Kitchen Sink (8 Steps)
Step 1: Prep Kitchen Sink
Start by cleaning the kitchen sink and removing all items from it to give you a clean workspace.
Step 2: Remove Old Caulking
At this time, you will need to remove the old caulk around the sink.
You can do this using a putty knife or a utility knife. In a pinch, you can use a butter knife or screwdriver.
The majority of the caulk should lift up.
Step 3: Clean Area with Alcohol
Any remaining caulk can present a problem, so you need to remove it as thoroughly as possible.
You can use alcohol or acetone to clean the residual caulk if you don’t have caulk remover handy.
After you clean the area, let it completely dry before proceeding. If you don’t let the area dry completely, you can end up retaining moisture. If this happens, you can experience mold and mildew.
Step 4: Prep Caulk Gun
Cut the tip of the tube of caulk at a 45-degree angle only about as thick as you want the caulk to be around your sink.
You will put the caulk into your caulk gun and then pull the trigger a couple of times to bring the caulk to the tip of the gun.
Step 5: Apply Painters Tape Around Sink
Apply painters’ tape around your sink, leaving just a small gap for the caulk. The tape ensures that the caulk looks clean, and it prevents you from getting caulk on your countertop.
Step 6: Caulk Your Sink
Now, you are ready to caulk your sink with new caulk, or silicone sealant.
You will place the tip of the gun toward the sink at a 45-degree sink and gently pull the trigger and apply a steady line of caulk around the sink. Do your best to caulk in a continuous stream around the entire sink.
Step 7: Smooth and Clean Up Caulk
You may notice that the caulk looks a little uneven after you remove the painter’s tape.
You can smooth the edges with your finger and wipe away excess caulk with a damp paper towel.
Do this step right away before the caulk dries.
Step 8: Wait 24 Hours Before Using Sink
You will need to wait 24 hours before using your sink to let the caulk dry. If you use the sink before the caulk dries, it can ruin the caulk. It can also retain moisture in your sink.
Final Thoughts on How to Recaulk a Kitchen Sink
Whether you have a stainless steel sink or porcelain sink, you need to apply caulk around the edges to help create a tight seal with the countertop. You should apply new caulk to your sink every couple of years to eliminate water waste and water damage. We hope this guide helped save you money and make it easier to recaulk your kitchen sink by yourself.
Need Local Help?
Get Fast, Local Plumbing Service
Connect with an expert plumber in your local area to tackle any job – big or small. Find help with leaks, clogs, or full installations.
Select your service category on the form, provide your details, and an expert plumber will be in touch!
Plumbing Navigator is an informational site that connects visitors with local plumbers but does not directly provide plumbing services or operate as a licensed company.
FAQs For How To Recaulk A Kitchen Sink
How do you reseal a kitchen sink?
To reseal a kitchen sink, remove the caulk and reapply a new layer of caulk.
Should a kitchen sink be caulked?
All kitchen sinks require caulk to prevent leaks.
How do you prepare a sink for caulking?
To prepare a sink for caulking, you remove the old caulk and apply plumber’s tape around the edge of the sink.
Meet Your Plumbing Navigator
About Plumbing Navigator
We’re passionate about all things plumbing, and love sharing tips, “how-to”, and reviewing the latest products to help make your project a success!
Learn More Plumbing Tips
Want to tackle more plumbing projects? Check out these helpful guides!
Got Plumbing Questions? Search For In-Depth Answers Below!
About Plumbing Navigator
We write about "all things plumbing," helping you navigate common questions, repairs, and the best plumbing products on the market.
About Plumbing Navigator
We write about “all things plumbing,” helping you navigate common questions, repairs, and the best plumbing products on the market.