Do you want to learn how to vent a kitchen sink? Many people assume that they don’t need to vent their kitchen sink and usually assume that ventilation only applies to their home’s HVAC system.
However, proper kitchen sink ventilation can ensure that you don’t experience a kitchen sink clog, a gurgling sink, or a sewer smell.
In this PlumbingNav guide, we will cover:
What you need to know about venting a kitchen sink
Supplies you’ll need to vent a kitchen sink
How to vent a kitchen sink
What's In This Guide?
What You Need To Know About Venting a Kitchen Sink
All kitchen sinks require ventilation thanks to the international plumbing code.
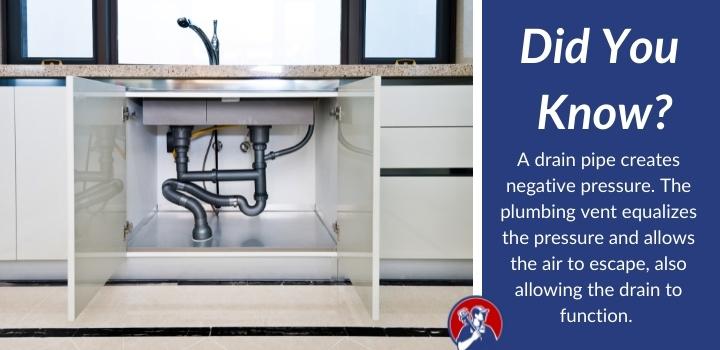
When a drain pipe drains it creates negative pressure. The plumbing vent equalizes the pressure and allows the air to escape, also allowing the drain to function properly and remove anything you put down the drain.
Proper ventilation also prevents sewer gas from re-entering your home, lowering the quality of the air in your kitchen. Improved air quality is especially important if you use a gas oven and other gas appliances in the kitchen.
The idea of kitchen sink ventilation is to guide the vent pipes to the main vent of your home that sends all materials up through your home and out of the roof using a horizontal pipe. You will never have the vent pipes point downward.
If your sink rests under a window, you may need to use a horizontal pipe under the window until you can send the pipe in a vertical direction again. For an island sink, you will use a loop or wet vent.
Before getting started, you should understand the basic setup of your kitchen sink.
Underneath the sink, you will find a supply line that brings water to the faucet and the sprayer. They both have a designated supply line.
Once excess water escapes down the drain, the strainer collects food waste and other debris.
Water then goes through the P trap and flows out of the waste line, or drain line, that sends waste water out of your home to the sewer.
You will install the vent in between the P trap and where the waste line drops to the sewer.
Supplies You’ll Need To Vent A Kitchen Sink
Vent Pipe
Your vent pipe should have a minimum pipe size of 1.5” diameter to prevent clogs. You can go up to 2” in diameter if necessary.
You can find ventilation pipes made from PVC or copper. PVC is easier to work with for novice DIY plumbers.
Sanitary Tee
A sanitation tee is a specialized ventilation fixture designed when attaching a vent to two horizontal lines with two ports.
A similar plumbing fixture, known as a sanitation wye, is used to connect a horizontal vent line to a vertical line.
Plastic Pipe Cement
Plastic pipe cement is a special adhesive designed to connect plastic pipe to the appropriate fitting. Once applied, it uses chemicals to melt the plastic then rehardens to bond the pipe to the fixture.
Only use plastic pipe cement when working with PVC pipes.
Hacksaw
You will likely need to cut through some of your existing piping throughout the ventilation process. In order to cut through PVC pipe, you can use a hacksaw,
How To Vent A Kitchen Sink (6 Steps)
Step 1: Prep Your Kitchen Sink
You will need to clean the sink and remove everything from the cabinet underneath the sink so that you have a clean and spacious area to work with.
Use your plastic pipe cement to attach a sanitary tee to the waste line where it drops vertically. The sweep of the sanitary tee should face downward to encourage proper water flow, and one part should face down while the other port faces up.
Step 3: Attach New Vent Pipe to Sanitary Tee
Now, you can attach PVC pipe to the port on the sanitary tee facing upward with plastic pipe cement.
Step 4: Locate Connection Point of New Vent Pipe to Existing Ventilation System
The pipe you attached to the sanitary pipe must now connect to the rest of your ventilation system. You will probably find this connection point in your walls. You will likely need to feed the pipe through your walls to find a convenient location.
Your new ventilation pipe must face upward or horizontally.
If you can’t find a connection point, you will need to create an individual vent for the kitchen sink, which is a much more extensive project. Alternatively, you may be able to use an air admittance valve, or studor vent, that doesn’t require an attachment to your main ventilation system.
Step 5: Cut Existing Pipe
Use a hacksaw to cut the existing ventilation piping at the desired location.
You may choose an alternative method outside of using a hacksaw, depending on the type of vent piping and your preferences.
Step 6: Attach Sanitary Tee to Existing Ventilation Piping
You will not add a sanitary tee to the existing ventilation piping using your plastic pipe cement. Keep the sweep angle facing upward.
You will attach the new pipe to the perpendicular port.
Final Thoughts on How to Vent a Kitchen Sink
Drain pipes require proper ventilation to help remove the items you send down the garbage disposal and prevent sewer gases from entering your home. While the process may appear intimidating at first, this step-by-step guide should give you the information you need to complete the task yourself. A proper venting job will ensure your water drains nicely, and prevent a gurgling kitchen sink.
Need Local Help?
Get Fast, Local Plumbing Service
Connect with an expert plumber in your local area to tackle any job – big or small. Find help with leaks, clogs, or full installations.
Select your service category on the form, provide your details, and an expert plumber will be in touch!
Plumbing Navigator is an informational site that connects visitors with local plumbers but does not directly provide plumbing services or operate as a licensed company.
FAQs For How To Vent A Kitchen Sink
Does a kitchen sink need to be vented?
Yes! You should absolutely vent your kitchen sink.
Can you vent a sink inside?
You can vent a sink inside of your kitchen with the proper information and tools.
What happens if a sink is not vented?
Not only will you be out of the current residential plumbing code, but you can also experience a clog and sewer gas in your home.
Where is the vent pipe for a kitchen sink?
The vent pipe for a kitchen sink belongs where the waste line drops down to the sewer line.
Meet Your Plumbing Navigator
About Plumbing Navigator
We’re passionate about all things plumbing, and love sharing tips, “how-to”, and reviewing the latest products to help make your project a success!
Learn More Plumbing Tips
Want to tackle more plumbing projects? Check out these helpful guides!
Got Plumbing Questions? Search For In-Depth Answers Below!
About Plumbing Navigator
We write about "all things plumbing," helping you navigate common questions, repairs, and the best plumbing products on the market.
About Plumbing Navigator
We write about “all things plumbing,” helping you navigate common questions, repairs, and the best plumbing products on the market.