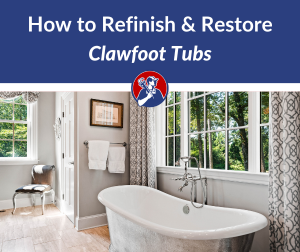
Refinishing a clawfoot tub is a rewarding project that can restore vintage charm and save thousands over a full replacement.
Whether you’re reviving an antique or modernizing an old cast iron tub, this guide walks you through every step.
Below, we’ll cover prep, materials, technique, and when it’s worth hiring a professional for help. Let’s dive into the world ofclawfoot tub restoration. (And also some mistakes to avoid!)
What's In This Guide?
What Is Clawfoot Tub Refinishing?
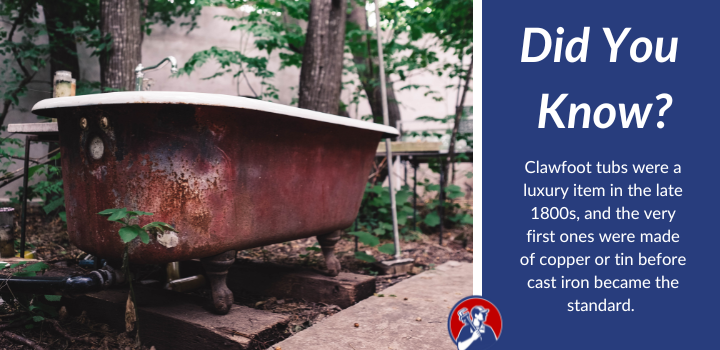
Clawfoot tub refinishing, also called resurfacing or reglazing, is the process of renewing the surface of an old bathtub.
Over time, porcelain or enamel finishes can become chipped, stained, or dull. Rather than replacing the entire tub, refinishing it gives you a brand-new look at a fraction of the cost.
This technique is especially popular for bathtub refinishing projects involving cast iron clawfoot tubs. The thick, heavy body of these tubs makes them ideal candidates for restoration instead of disposal.
Need Local Help?
Get Fast, Local Plumbing Service
Connect with an expert plumber in your local area to tackle any job – big or small. Find help with leaks, clogs, or full installations.
Select your service category on the form, provide your details, and an expert plumber will be in touch!
Plumbing Navigator is an informational site that connects visitors with local plumbers but does not directly provide plumbing services or operate as a licensed company.
Tools and Materials You’ll Need to Resurface Your Claw Foot Bathtub
Before you begin, gather these supplies:
Chemical paint stripper or tub refinishing kit
Epoxy primer and tub refinishing topcoat (urethane or acrylic)
Respirator, gloves, and safety glasses
Painter’s tape and plastic sheeting
Orbital sander or sanding block
Tack cloth or lint-free rags
Optional: Mobile dustless sandblasting service
Using a professional mobile dustless sandblasting company is highly recommended if your tub has multiple layers of paint or rust buildup. Sandblasting removes all old coatings quickly and evenly, providing a clean surface for refinishing. Keeping it “dustless” will make less mess.
Step-by-Step: How to Refinish & Restore a Clawfoot Tub
1. Remove the Tub or Protect the Area
If possible, move the tub to a well-ventilated area, such as a garage or porch. If not, use plastic sheeting and tape to protect the bathroom. Ensure proper ventilation and wear your respirator.
2. Strip the Old Finish
Apply chemical paint stripper with a brush, let it sit per product directions, then scrape off the softened coating. This may take multiple passes. Alternatively, call a dustless sandblasting pro to do this quickly and without mess.
3. Sand and Smooth the Surface
Use an orbital sander or sanding block (150–220 grit) to scuff the entire tub surface. This helps the new coating adhere. Wipe with a tack cloth to remove all dust.
4. Repair Chips or Cracks
Fill any deep chips or imperfections with epoxy filler. Let it dry fully, then sand smooth.
5. Apply Primer
Use an epoxy primer specifically designed for porcelain or cast iron. Apply with a spray gun or high-density foam roller. Let cure as directed.
6. Apply the Topcoat
Choose a durable claw foot tub refinishing topcoat like acrylic urethane. Apply in thin, even layers (typically 2–3 coats). Allow sufficient drying time between coats.
7. Let It Cure
The tub needs 48–72 hours to cure fully before use. Keep the area ventilated and avoid dust or debris.
Tips for Claw Foot Tub Resurfacing Success
If in doubt, consult a miracle method refinishing specialist for guidance or services.
Always follow safety precautions as refinishing products contain strong fumes.
For best results, avoid humid or cold days.
Lightly sand between coats for the smoothest finish.
When to Hire a Pro to Help
DIY tub refinishing is feasible for handy homeowners, but it’s not for everyone. Here are signs you may want to hire a pro:
Tub has heavy rust or multiple old layers of paint
You want a flawless, commercial-quality finish
You’re uncomfortable using strong chemicals or spray equipment
You need a quick turnaround
Many refinishing specialists offer services similar to Miracle Method, a brand known for tub and tile resurfacing. Local mobile refinishers may provide cost-effective, dustless results that last over a decade.
Maintaining Your Refinished Clawfoot Tub
A properly refinished clawfoot tub can look amazing for years with the right care:
Use non-abrasive cleaners (no bleach or ammonia)
Avoid bathmats with suction cups
Repair chips quickly to avoid water damage
Refinishing is not a permanent fix, but with good care, it’s a long-lasting one.
Common Mistakes to Avoid When Restoring Your Claw Foot Tub
Skipping surface prep: This leads to poor adhesion and early failure
Using the wrong paint: Not all paint adheres to porcelain or cast iron
Rushing the cure time: Premature use can ruin your finish
Taking your time and using the right materials is essential for a lasting, high-gloss finish.
Final Thoughts on Clawfoot Tub Restoration
Whether you’re restoring a vintage piece or updating a worn cast iron tub, claw foot tub restoration is a project that pays off. You’ll save money, preserve history, and enjoy a gorgeous centerpiece in your bathroom.
And if it feels overwhelming? Don’t hesitate to hire a mobile pro. Many offer bathtub refinishing with dustless sandblasting and top-tier finishes that rival factory quality.
Claw Foot Tub Resurfacing FAQs
How much does it cost to refinish a clawfoot bathtub? DIY kits cost around $50–$100, while professional refinishing ranges from $300–$800, depending on location and tub condition.
Is it worth refinishing a cast iron tub? Absolutely. Cast iron tubs are incredibly durable, and refinishing extends their life at a fraction of the cost of replacement.
How do you resurface a clawfoot tub? Clean the surface, strip old paint, sand, repair chips, then apply primer and topcoat. Proper curing is essential.
How long does reglazing a cast iron tub last? With good prep and care, a reglazed tub can last 10–15 years. Avoid harsh cleaners and repair damage quickly.
Need Local Help?
Get Fast, Local Plumbing Service
Connect with an expert plumber in your local area to tackle any job – big or small. Find help with leaks, clogs, or full installations.
Select your service category on the form, provide your details, and an expert plumber will be in touch!
Plumbing Navigator is an informational site that connects visitors with local plumbers but does not directly provide plumbing services or operate as a licensed company.
Meet Your Plumbing Navigator
About Plumbing Navigator
We’re passionate about all things plumbing, and love sharing tips, “how-to”, and reviewing the latest products to help make your project a success!
Learn More Plumbing Tips
Want to tackle more plumbing projects? Check out these helpful guides!
Got Plumbing Questions? Search For In-Depth Answers Below!
About Plumbing Navigator
We write about "all things plumbing," helping you navigate common questions, repairs, and the best plumbing products on the market.
About Plumbing Navigator
We write about “all things plumbing,” helping you navigate common questions, repairs, and the best plumbing products on the market.