Let’s discuss how to properly tighten the kitchen faucet nut under the sink to fix a loose kitchen faucet, or install a new one. It can seem intimidating when you see these parts for the first time.
You want to get this one right, especially in a high-traffic area like a kitchen. Read this guide to learn how to tighten your kitchen faucet nut under the sink the fast and easy way.
In this PlumbingNav guide, we will cover:
What you need to know about tightening the kitchen faucet nut under the sink
Supplies you’ll need for tightening the under-sink kitchen faucet nut
How to tighten the kitchen faucet nut under the sink
What's In This Guide?
What You Need To Know About Tightening Kitchen Faucet Nut Under Sink
Your faucet relies on a nut to keep it in place. As part of your annual plumbing maintenance checklist, you should make a point to tighten the mounting nut that secures the faucet in place.
The nut will naturally become loosened over time due to heavy usage. When the nut becomes loose, it can make your faucet less stable and contribute to kitchen sink leaks.
It may seem simple enough to tighten a nut, but the kitchen faucet nut can be a little more challenging since it’s difficult to access.
The kitchen sink nut may also prove rather stubborn, especially if it’s been in place for years.
The greatest obstacle you will encounter involves corrosion (if you have a metal nut). Nuts can become corroded over time and this will make working on them much more difficult.
You may need to get a replacement nut if you notice signs of advanced corrosion. You will not need to worry about corrosion if you have a less sturdy yet corrosion-resistant plastic nut.
See Something Different? Alternatives To Mounting Nuts
In some cases, your faucet may mount with a screw or a hexagonal bolt.
If you notice that your sink uses a screw, you will use a screwdriver with a long handle.
To tighten the bolt, you will need a ratcheting socket.
Faucet Handle
A kitchen faucet handle doesn’t use the mounting screw that keeps the faucet in place. Instead, it uses a set screw. That’s a completely different job altogether.
Supplies You’ll Need For Tightening The Sink Kitchen Faucet Nut
Basin Wrench
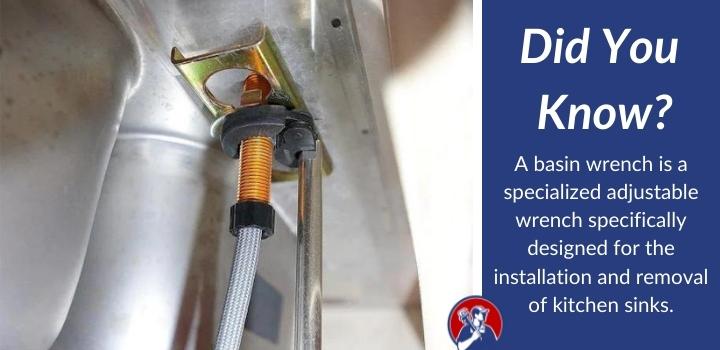
A basin wrench is a specialized adjustable wrench specifically designed for the installation and removal of kitchen sinks. It comes with an extra-long handle designed to reach into the back of your kitchen sink cabinet. It also has a self-adjusting gripping head that rotates.
You can not use an Allen wrench or socket wrench in most cases, since they don’t provide enough reach.
Channel-Lock Pliers
Channel-lock pliers have a long handle designed for hard-to-reach places. You can manually adjust the head, but the head doesn’t rotate. This can work if you don’t have a basin wrench.
Want to make this project simple?? We thought so. Pick up this handy faucet wrench on Amazon. Be sure to get this specific one that comes with a basin wrench.
Flashlight
You need adequate light in order to get the job done properly. The light on your cellphone won’t provide enough illumination, so you will need a high-end flashlight. You can also use a headlight so that you don’t have to worry about having to have someone hold the flashlight.
Second Person
It will be much easier for you to tighten the nut if you have someone who can help you throughout the process. They can hold the flashlight and hold the faucet in the correct position for you.
Turn off the water to your kitchen sink by locating the shut-off valve underneath the sink and turning the gate valve or ball valve that controls the water supply coming to your water supply lines.
For additional assurance that you won’t get covered in water, turn the kitchen faucet handle to the off position.
Step 2: Clean Under the Sink
Remove everything from under the sink so that you have plenty of space. You might be surprised just how much stuff has accumulated, and you can probably toss some of it. You’ll want a nice flashlight as well so you can see what you’re doing.
(Maybe) Step 3: Remove P Trap
You likely won’t have to do this, but in some cases, a P Trap can impede your access to the nut, so you will need to remove it. It holds water to keep sewer gases from entering back in your home, and it’s where you can retrieve or remove items that fall down your kitchen sink such as a ring or earring. You’ll need a bucket handy because there is water inside it.
Step 4: Adjust Faucet
If your kitchen faucet becomes loose, you will need to move it into the correct centered position first. If you have a helper, have them confirm the position up above so you don’t have to crawl back out.
Once you have the faucet exactly where you want it, it’s helpful for someone to hold it in place since it might move once you begin tightening it.
Step 5: Tighten Faucet Mounting Nut Using Basin Wrench
At this point, you will be able to tighten the nut. To tighten the nut, you will turn it clockwise.
You can start by using your hands to tighten the nut. But, you will need to use the basin wrench to ensure the nut is secured tightly. The jaws will grip the nut, and you will rotate the handle clockwise.
Do not overtighten the plumbing nut. If you do, you may damage a plastic nut, or make a plastic nut too difficult to remove in the future.
Step 6: Restore Water and Plumbing
Replace any plumbing fixture you removed and open the water valve. Verify that the faucet no longer wobbles and the water is flowing properly.
Here is a video demonstrating how to tighten a sink nut on a faucet head setup:
Final Thoughts on How to Tighten Kitchen Faucet Nut Under Sink
You might want to buy a new kitchen faucet, but you don’t have to just because your existing one is a bit loose. Instead, take the time to tighten the kitchen faucet yourself using this guide.
Once you get past the water supply line and P Trap, you can tighten the old faucet using the right tools that provide adequate reach.
Once you’re done, it may be time to turn your attention to the bathroom faucet.