Do you have a leak coming from underneath your house? You may have a slab leak.
All houses get support from their foundation, and in the South where few basements exist, it’s called a slab. Houses that sit directly on a slab can experience plumbing problems called slab leaks because their water supply and drain pipes are inside the concrete slab.
In this PlumbingNav guide, we will cover:
- What is a slab leak?
- How to identify a slab leak
- What to do if I have a slab leak
| What's In This Guide? | |
|---|---|
|
|
|
What Is A Slab Leak?
Slab Foundations
What is a slab foundation? Some homes utilize a concrete slab for the foundation, particularly in the South or where clay concentrated soils or high water tables are present.
Plumbing pipes are laid out before the concrete foundation is poured. This is why pipes are later referred to as being “under slab.” How deep these plumbing pipes will depend on your local building code.
Slab foundations cost roughly 40% less than standard deep foundations, such as a basement or crawl space. However, you will find it difficult to access your “under slab” pipes if there is a problem.
Slab Leaks Explained
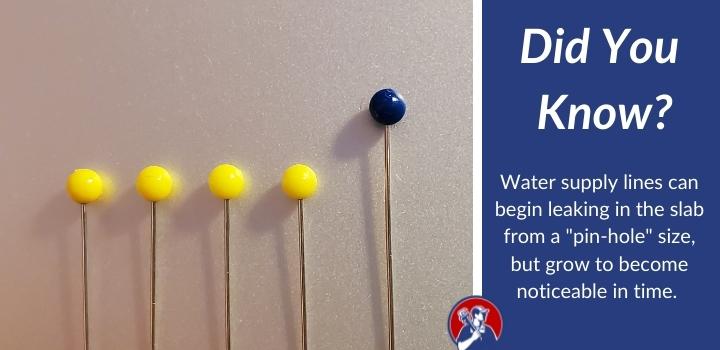
If the lines inside your concrete slab foundation develop a crack or pinhole it will result in a slab leak. When left undetected, a slab water leak can generate up to 10,000 gallons of wastewater in a single year!
Most metal pipes are susceptible to corrosion, a natural process that turns the metal into rust. This deterioration can lead to a leak, especially in a copper supply pipe or an older metal drain pipe.
Excessively high water temperatures and pressure levels can also accelerate the deterioration of your pipes.
Plastic or PEX pipes also develop holes as well. The cause might be a manufacturing defect, the cause of mineral elements in hard water, or a settling and shifting foundation that places pressure on the pipes. It goes without saying that a house in need of foundation repairs might also suffer from a plumbing slab leak.
Gaining access to this part of your home can prove problematic if you suspect a problem.
First, you need to identify that you actually have a slab leak. Second, you need to determine the location and the cause so that you can take the proper steps to fix the water leak in your slab.
Let’s explore the different types of slab leaks…
Leaking Water Supply Line Vs. Damaged Drain Line
A supply line brings water to the different faucets and appliances throughout your home using pressure. They tend to be narrow and made from plastic, PEX, or copper.
A drain line removes waste water from a specific faucet, tub, or toilet and transports it away from the home through the main sewer line using gravity.
To check if you have a damaged supply line, you will use a hydrostatic test to examine the pressure levels. If the problem occurred at the supply line, you will struggle to access the line itself for repair.
Drain pipes tend to be thicker and sturdier than your supply lines in order to accommodate higher usage, and prevent drain pipe clogs. This is particularly true in the main drain line where waste leaves your home.
Leaks in the drain are also not as easy to identify. You can’t use a hydrostatic test since a drain leak won’t generate abnormal pressure levels.
Remember, your supply lines require substantial amounts of pressure to move water to far-reaching fixtures and stories in your home. Drain lines don’t require the same level of pressure.
What Are the Signs of A Slab Leak?
How can you really tell what’s happening underneath your concrete slab to know if you have a leak? Look for the following simple clues to identify a slab leak…
Expensive Water Bill
Most homes receive a relatively stable water bill from one month to the next. Exceptions might be guests staying at your home, or a seasonal sprinkler bill during Spring.
If you notice that your water bills seem to be getting higher and higher with time, it may indicate a slab leak. Slab leaks are a culprit for why your water bill is so high when no other explanation exists.
Note: You might have a different leak such as a running toilet or faucet. You should rule these out first, as they will be easier to observe.
Low Water Pressure
If your water doesn’t have the same amount of power as it usually does, that can also indicate a slab leak. An isolated drop in pressure might result from construction in the area. However, sustained low water pressure is a cause for further investigation.
Most residential water systems have a pressure regulator set to 50 – 60 pounds per second (psi).
Water Felt on Floor
The most noticeable indicator of a slab leak will be water seen or felt on your floor.
Indoors, this can resemble a spill or pet accident. These can and do happen, but if you notice recurring and repeated wet spots that aren’t explained the water might be coming from a pipe in under the floor.
Water Seen on Foundation
Outdoors, you might experience water spots on the exterior walls of the concrete slab foundation. It could be caused by a sprinkler. However, if you can’t identify a natural cause it could be coming from a slab leak that is pushing water out.
Water leaking inside your slab has to escape and flow somewhere. Water is powerful while under pressure. It will make its way by rising to the floor above or eventually to the walls outside your home.
Confirming a Slab Leak
Let’s talk about how you can confirm and locate a slab leak. We’ll first talk about this from a DIY standpoint, and also when calling a professional plumber or leak detector is necessary.
These are some of the most common tools you’ll use to identify a slab leak related to your drain system. (This won’t work on the supply side.)
Endoscope
An industrial plumbing endoscope feeds into your drain and provides you with an image of the inside of your drain thanks to a specialized camera on the end of the locator. The flexible design allows it to maneuver through any plumbing system.
Electromagnetic Locator
A locator at the source of the clog or leak can send signals to a receiver that allows you to identify exactly where the problem in your pipes is clearly.
In many cases, you can find locators automatically included in your endoscope. Some products will have a receiver included as well. If your item didn’t come with a receiver, you could use any receiver you may have for other power tools as long as they run on the same frequency.
How To Identify A Slab Leak
Identifying a slab leak on the supply side of your plumbing system can get tricky. Watch this video showing how to test for water leaks in your system:
Step 1: Install a Pressure Gauge
First, you will install a pressure gauge to an exterior faucet, or “bib”.
Attach the pressure gauge to the faucet attached to the outside of your house using the appropriate coupling.
Once connected, provide water to the faucet to ensure that you don’t notice any leaks coming from the pressure gauge.
Step 2: Shut Off Water
Shut off the water to your home at the main water supply to avoid exacerbating the leak.
You will shut off the water to your entire house using the main water supply shut-off valve. In most cases, you will find the main shut-off valve outside attached to the lower end of your home’s siding or near your water meter.
***If you’re on a well, you can find the water shut off either at the well or where the main supply enters your home. It may also be inside the garage.
Once you turn off the water at the main water line, you should open your faucets for about 30 – 60 seconds to allow any excess water to drain from the pipes. Close all faucets before moving on to the next step.
Don’t forget to remind everyone on the premises that water will not be available while you work, including the toilets.
Step 3: Notate Pressure Gauge Reading
As soon as you turn off the water to the house, read the pressure gauge to find your “static water pressure”, which is the pressure rating of liquid or gas when it’s not moving (think of the pressure inside of a balloon).
Your pressure gauge will typically have an analog display with an arrow that points at the pressure level rating.
Remember to record your pressure levels as soon as you turn off the water.
It can be beneficial to document your findings by writing them down or taking a picture.
Step 4: Take a Second Pressure Reading
The idea is to see if the pressure drops compared to your initial static water pressure reading, and pressure loss, especially from a small pinhole leak, takes time.
We suggest waiting at least 15 minutes.
After 15 minutes, read the pressure gauge a second time.
If the pressure dropped, you have a leak. If the pressure remained the same, you do not have a leak. (Not a slab lea, anyway).
Step 5: Check For Other Leaks
Before you go through the trouble of digging into your concrete slab, verify that the leak isn’t coming from another source. (By the way, we suggest you don’t dig up your floor without confirmation or professional help.)
Start by checking for a leak at your water heater, as it contains a simple shutoff valve.
If the pressure doesn’t continue to decrease when you turn off the water heater, you don’t have a problem beyond the water heater (which may indicate that the leak is through the supply lines as opposed to the drain lines).
If the pressure levels do continue to drop, inspect the various appliances and fixtures throughout your home, such as your sinks and toilets.
If you still can’t find a leak anywhere inside your home after a thorough investigation, you may have a slab leak.
Step 6: Perform Hydrostatic Test
It’s not enough to know that you have a slab leak. You also need to know the location of the leak.
You can’t perform a visual inspection since the pipes exist under your concrete slab foundation. You also don’t want to guess wrong and damage more of your foundation than necessary.
At this time, you should perform a hydrostatic test to check how much pressure your pipes can withstand and help pinpoint the location of the leak.
To perform a hydrostatic test, you will create about 1.5x the normal pressure in the pipes. Then, you will test the pressure levels throughout the pipe to identify weak points.
Step 7: Mark Location of Problem
When you do notice an issue, you need to mark the exact location so that you can go back and resolve the problem at its source.
Since the leak probably developed under the concrete slab, it can be difficult to identify the exact location. However, record the data you have and locate the problem to the best of your ability.
Step 8: Arrange For Repair
If you’ve determined that you do in fact have a slab leak, you will need to schedule the plumbing repair and potentially fix your foundation if this was behind the cause.
You can’t repair a slab leak yourself without the proper training, so you will need to enlist professional services. A common question is this: does homeowners insurance cover plumbing repairs like these? The answer is often no when it comes to actual repairs, however, your policy may cover water damage caused by the slab leak.
Slab leak repair costs an average of $2,280, but the price varies based on your specific situation, including the location and severity of the slab leak.
How to Repair a Sewer Drain Pipe Slab Leak
Locating and fixing a slab leak related to your drain pipe is a bit different. For this, we suggest you watch this video as it will give you an appreciation for what is involved. Most homeowners resort to calling a professional plumber for help.
What To Do If You Have A Slab Leak?
If you do have a slab leak, you will need to call a plumber with extensive experience regarding your home’s sewer line and other deep parts of your plumbing.
A number of factors will go into the final cost of your professional plumbing services. However, on average, you can expect to pay $400 if you have a plumber inspect for a slab leak. Some companies specialize in leak detection only, while others just focus on the repairs.
For foundation leak repair (including the inspection), you can expect to pay an average of $2280. In some cases, this can be as high as $5,000 or more.
Final Thoughts on Under Slab Leaks
A water leak can cause expensive water damage or mold. Slab leak detection can be difficult since it occurs underneath the foundation of your home. However, you can identify it yourself with the right tools. While we are all about DIY here at PlumbingNav.com, this type of job is best suited for the professional.
FAQs For What Is A Slab Leak?
How much do slab leaks cost to fix?
It costs $2280 on average for slab leak repair, but the price varies from house to house.
What are the signs of a slab leak?
Look for the following signs of a slab leak if you suspect a problem:
- High water bills
- Low water pressure levels
- Moisture under your basement flooring
- Rushing water sound
How serious is a slab leak?
Slab leaks can result in high water bills and expensive repairs. The cost accumulates over time (like a snowball), so it’s important to repair the issue as soon as you notice it. If left unattended for too long, you may even experience a burst pipe and further home damage.
What exactly is a slab leak?
A slab leak refers to a damaged pipe underneath your concrete slab foundation. The water exits your pipe inside your slab, finding its way to interior or exterior “leaks” to relieve pressure.
Meet Your Plumbing Navigator

About Plumbing Navigator
We’re passionate about all things plumbing, and love sharing tips, “how-to”, and reviewing the latest products to help make your project a success!
Learn More Plumbing Tips
Want to tackle more plumbing projects? Check out these helpful guides!